Client allocation profiles
Client allocation profiles cater for businesses who allocate clients to specific departments or individuals (for example partners in accountancy practice).
This profile sets a default team users for a group of clients, which means all communication would be sent from the owner of the allocated group.
Setup client allocation profile
Create a distinct category profile
- Log in to FACTS online as the primary user.
- Navigate to "Organisation -> Profiles" at the left bar.
- Click "Manage profile" at the right task bar.
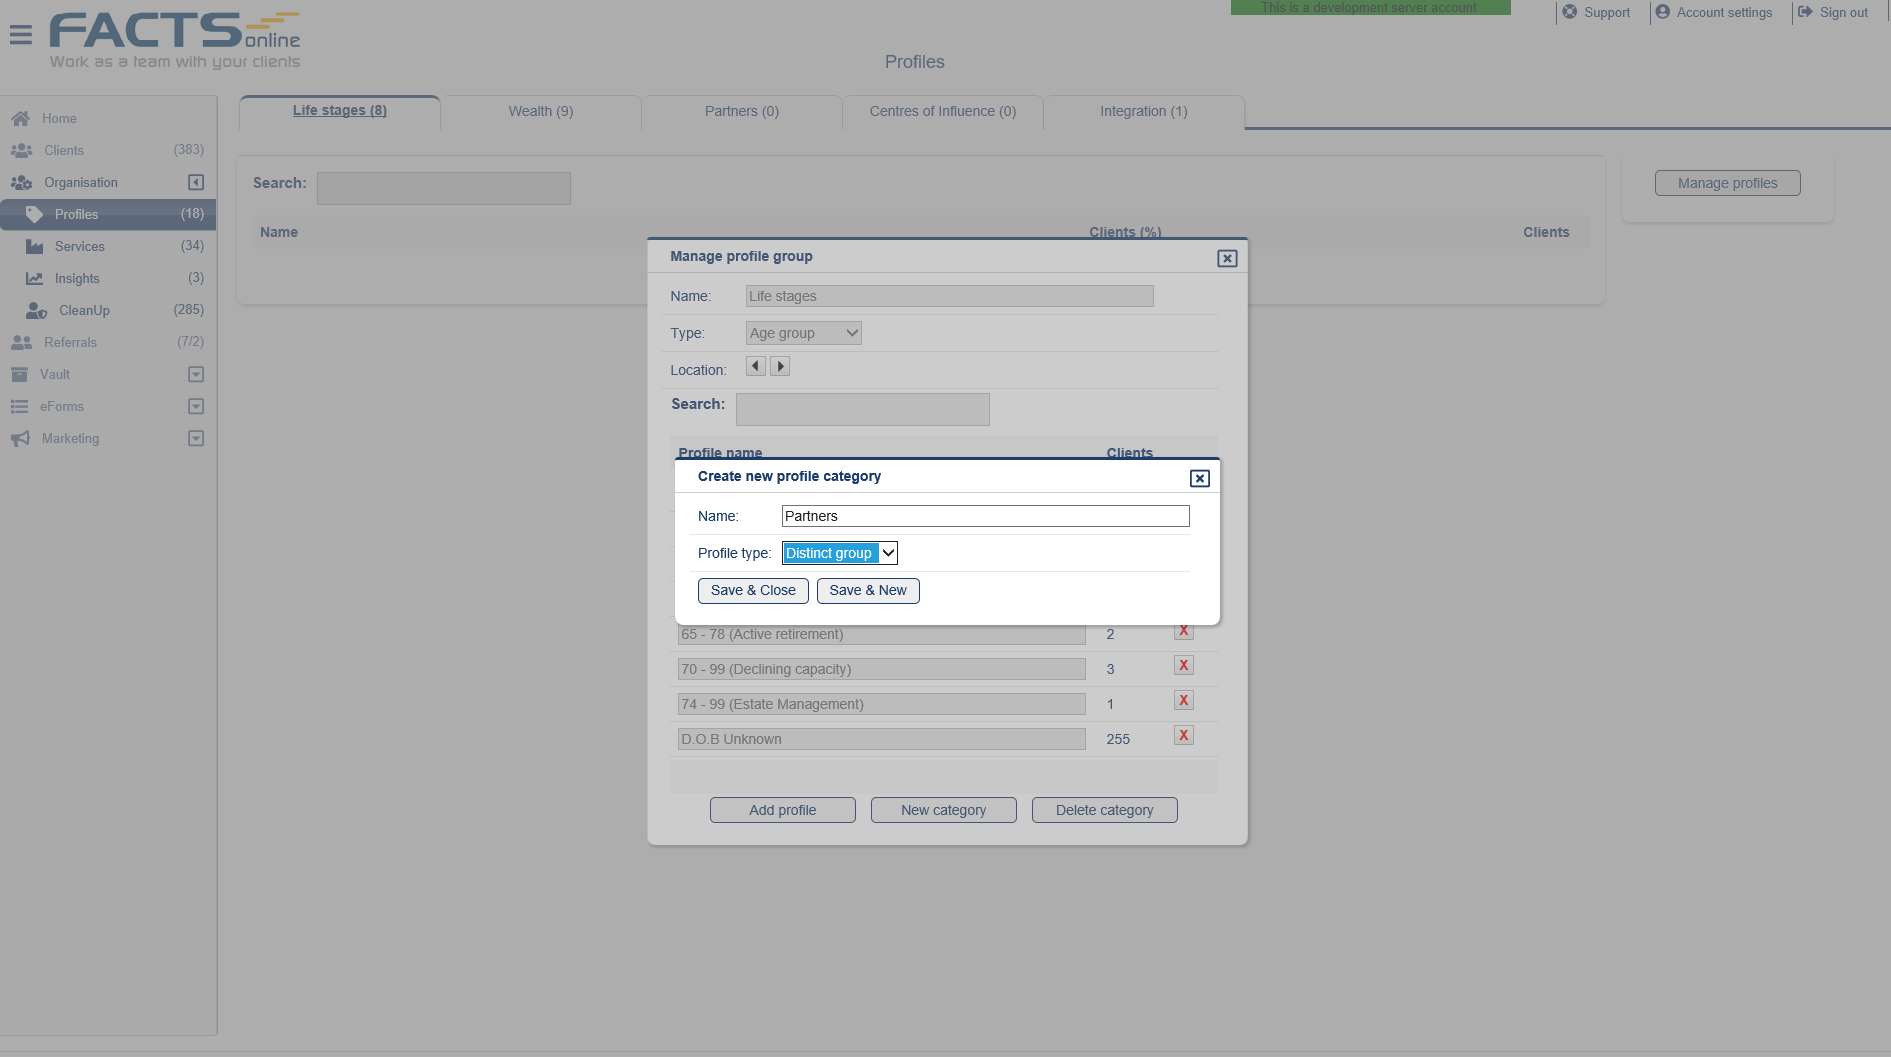
- Select "New category".
- Enter a category name (for example Partners) and select "Distinct group" at Type.
- Save and Close.
- Close the manage profile category and click the new category (in this example, "Partners").
- Close the profile management window.
Note: A distinct category group allow client membership to one group within the category. For example, this can be used to allocate a group of clients to a partner.
Add distinct profiles
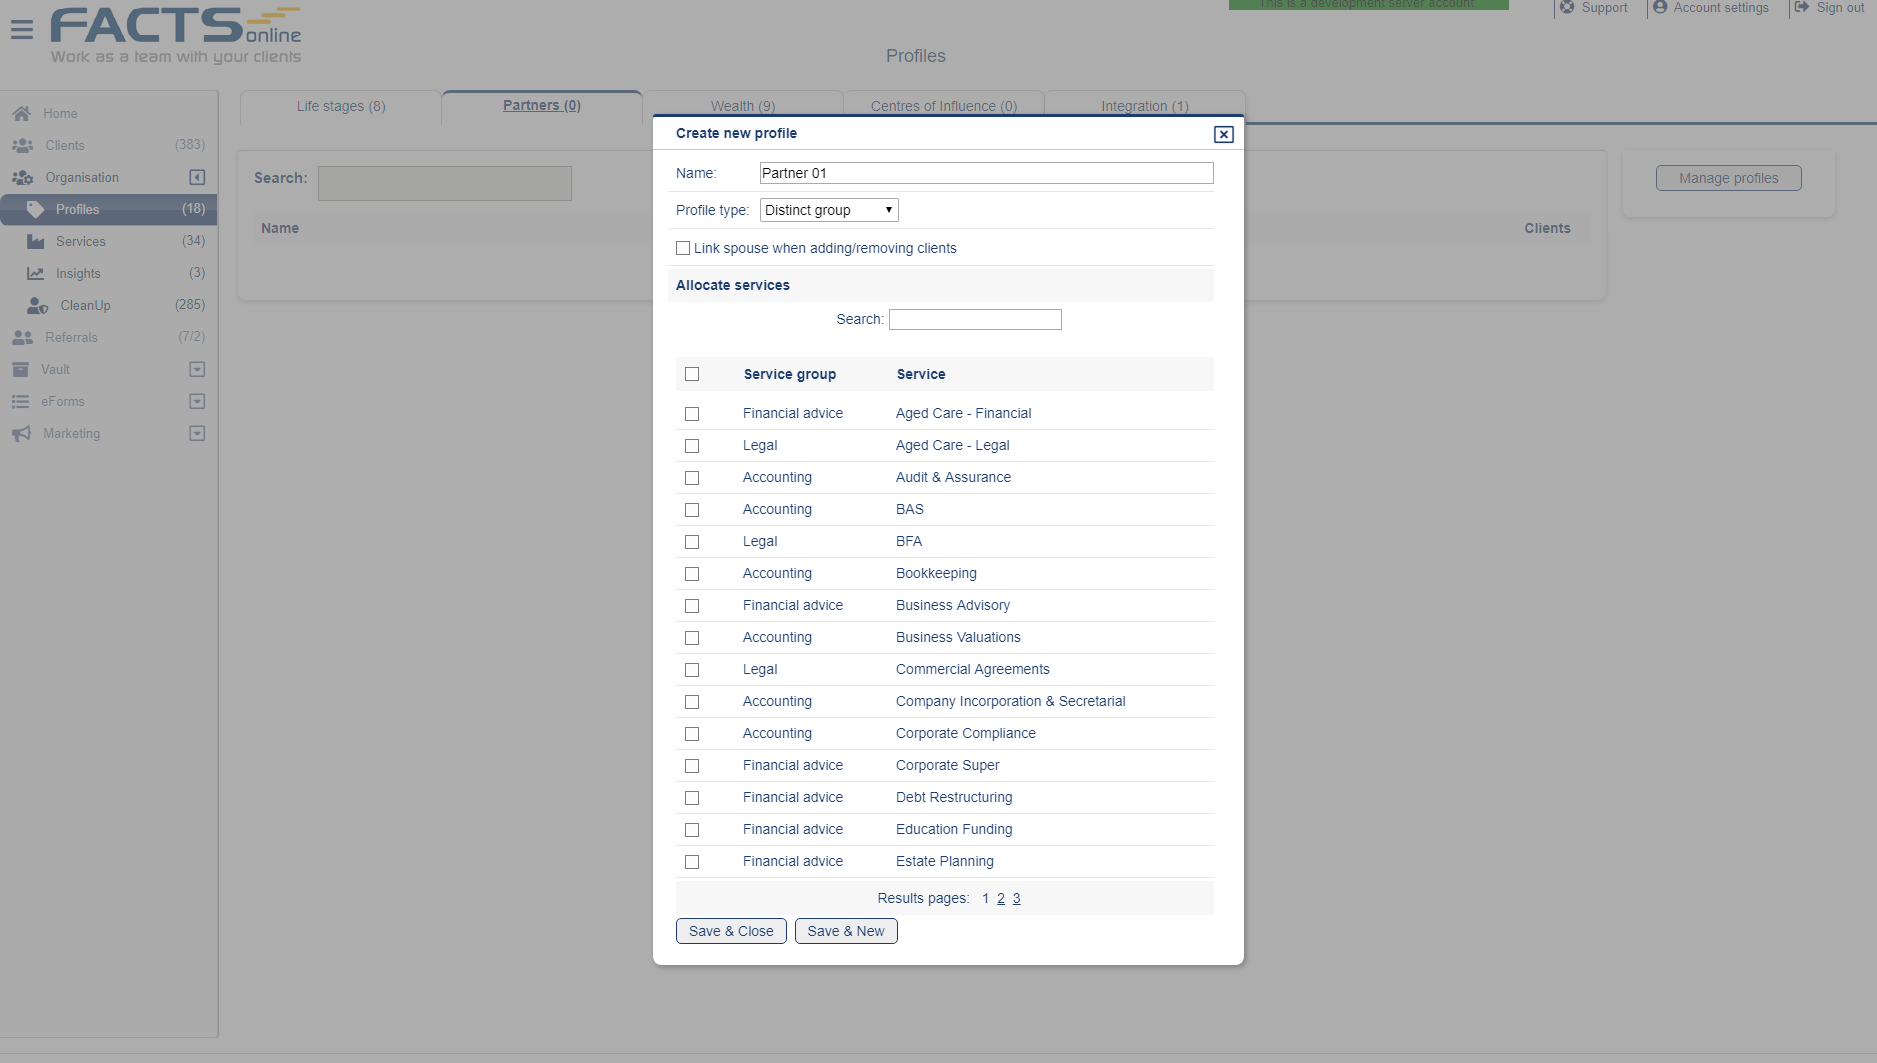
- Click Add Profile.
- Enter partner or division name.
- Click Save & Close.
- Repeat for each partner or department.
Link team user email to profile
For each distinct group created above:
- Click the profile name.
- Navigate to "Profile details" on the left bar.
- Tick "Emails clients from this group owner".

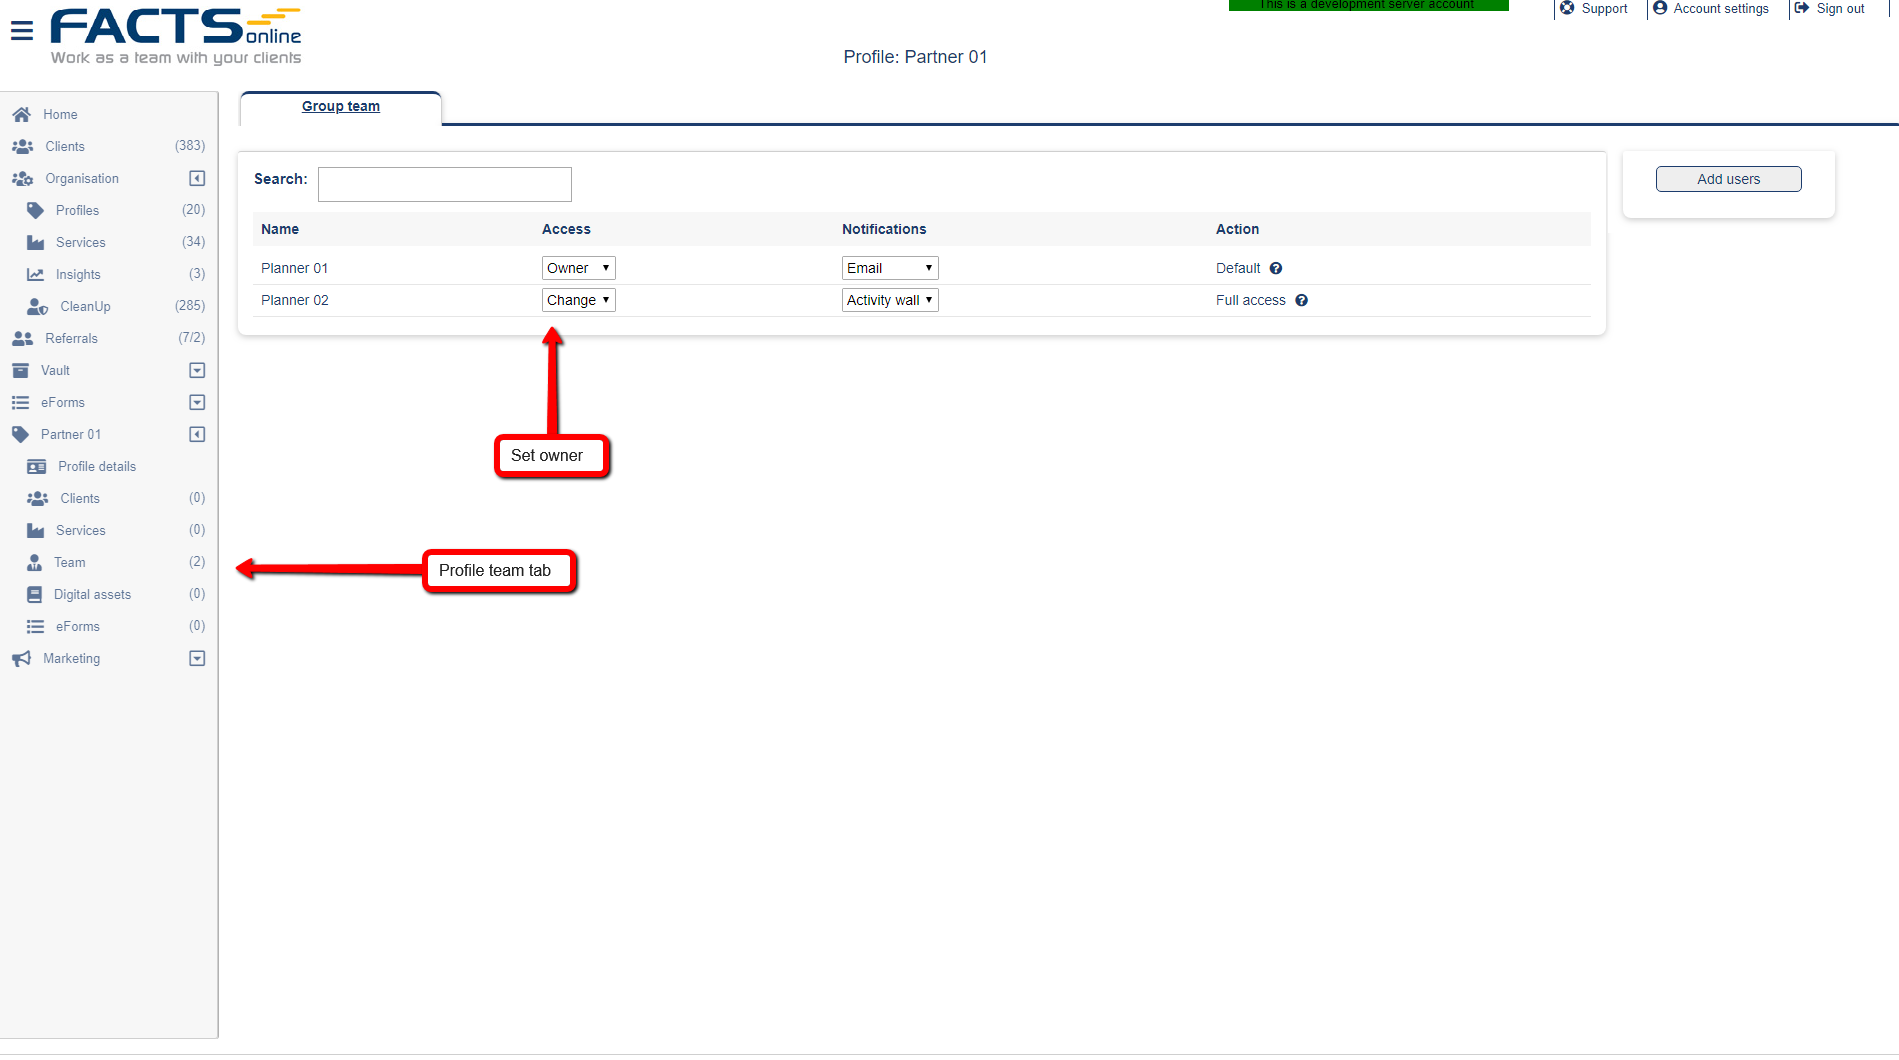
- Navigate to "Team" on the left bar.
- At the "Access" column, designate a group owner.
Add distinct profiles sink
A distinct profile sink manages all non-allocated clients for distinct categories. It can be used to allocate new clients to partners or for sets of clients that are not related to the distinct group.
- Click add Profile.
- Enter "Not allocated" in the Name field.
- Select "Distinct sink" in the profile type.
- Click Save & Close.
Manage client allocation profile
Add client window
- From the dashboard click "Add Client.".
- Enter the client details.
- At "Profiles and Services" select a distinct group.
- Click any of the save options as required.

Distinct sink profile
- Navigate to "Organisation" -> Profiles.
- Navigate to profile category (Partners).
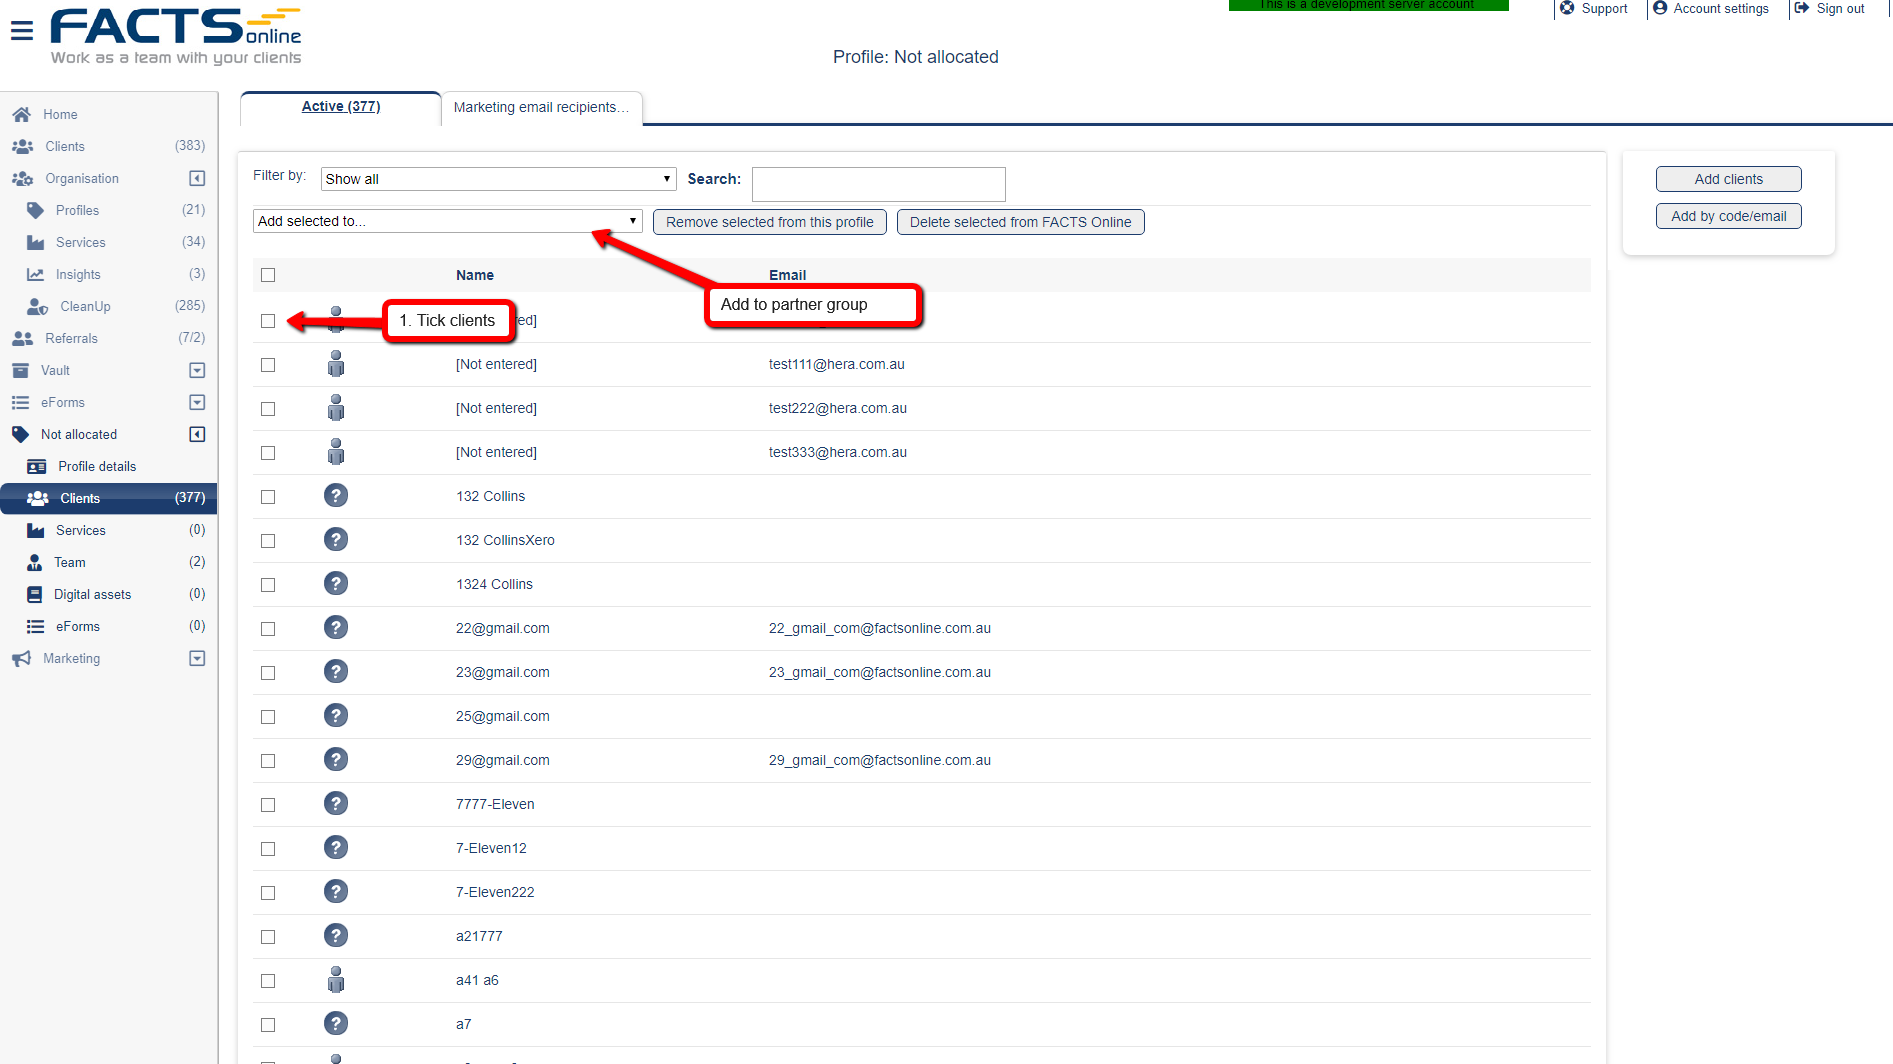
- Click your sink group (Not allocated).
- Tick clients to be allocated to groups.
- Select from "Add selected to" and target a distinct group.
Note: Clients will be added to a distinct group and removed from the sink group.